Rain barrels are an incredibly useful tool for gardeners and homesteaders. Collecting rain water for your garden is an excellent way to reduce your water bill and take the strain off of the local infrastructure if you’re on city water. Rain water is free from additives to city water supplies, such is chlorine, and ground water pollutants and contaminants like PFAS and forever chemicals that can be found in wells in some parts of the country. We grow food to reduce the amount of chemicals that we are putting in our bodies, so watering our gardens with these chemicals defeats the purpose for our family. We have found, however, that pre-made rain barrels can be prohibitively expensive. In this guide I’m going to show you how to build your own DIY rain barrel to start collecting rain water for your garden right away.
Finding A Barrel
I was able to find several reasonably priced barrels on Facebook Marketplace relatively close to our home. Search your local Marketplace and Craigslist for an affordably priced barrel, but if you’ll be using your rain barrel to water edible plants try to find one that is food grade. We ended up choosing a 50 gallon pickle barrel that someone was selling nearby.
Choose A Location For Your DIY Rain Barrel
Once you’ve found your barrel, you’ll need to decide where you want to place it. Asphalt and composite shingle roofs are petroleum based. You do not want to use rain water off of a shingle roof to water edible plants because the runoff will be toxic. We have always set our rain barrels up beside sheds, barns, and carports with metal roofs. If you have a metal roof on your home or if you are only watering ornamental plants you can set your rain barrel up to collect runoff from the roof of your house.
Before setting up your rain barrel, walk around the building that you’ll using to collect rain water while it is raining. Take note of where the water runs off the roof or out of the gutters naturally. This is where you want to set your rain barrel up.
If you plan to set up drip irrigation, you’ll need to put your rain barrel uphill from the garden you will be watering.
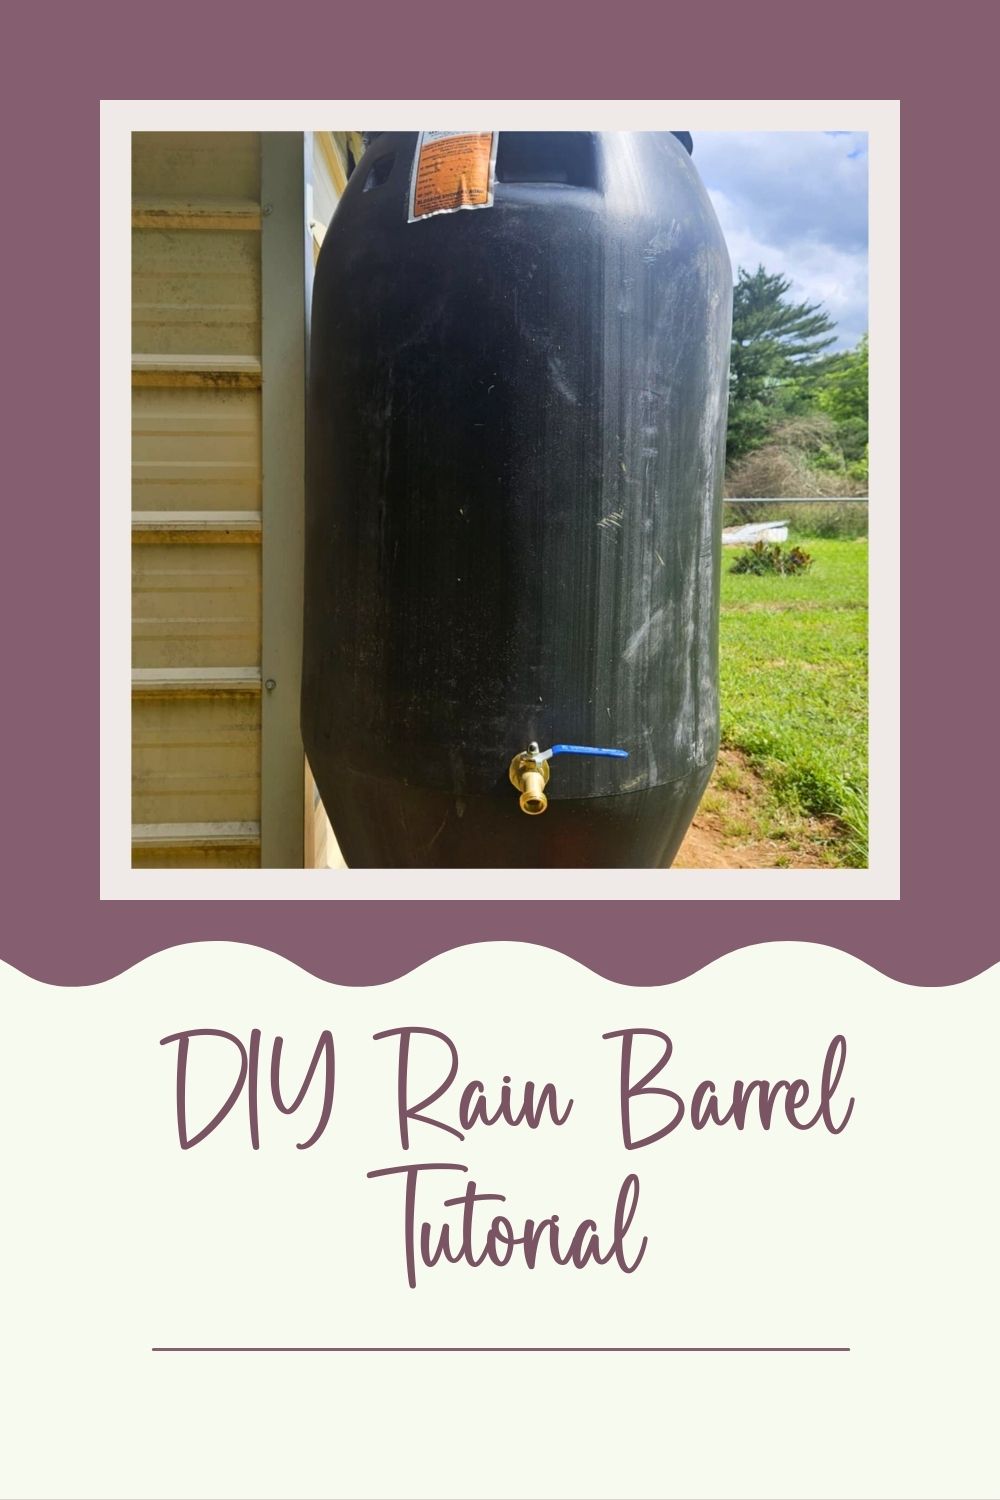
How To DIY A Rain Barrel
- Use an oscillating saw to drill a rectangle in the lid of your rain barrel. This is where the barrel will collect water.
- Cut a piece of plastic gutter guard to fit over the rectangle hole in the lid. Secure the gutter guard to the lid with screws. The gutter guard will prevent debris from entering your rain barrel.

3. Use a hole saw drill bit to drill a hole for the spigot on the front of your rain barrel. Make sure the hole saw drill bit that you buy is the correct size for the spigot kit you’ll be using.
4. Attach the rain barrel spigot to your barrel.

Setting Up Your DIY Rain Barrel
Now that you’ve chosen a location and built your DIY rain barrel, you’ll need to set it up.
5. Use a shovel to level the area where you’ll be placing your rain barrel.
6. Stack cinder blocks on your leveled dirt where you want your rain barrel to sit. You could stack the cinder blocks just high enough to fit your water can under the spigot. I plan on installing a DIY drip irrigation system in the future, so I went ahead and stacked my cinder blocks as high as possible.
Cinder blocks are more stable if you stack them with the holes facing up. I turned them sideways for my last stack to give the rain barrel something level to sit on.

And that’s it! You’re ready to let that rain barrel fill up and start watering your garden with fresh rain water! This was a much quicker and simpler project that I had originally imagined it would be.

How To Prevent Mosquitos From Laying Eggs In Your Rain Barrel
To prevent mosquitos from laying eggs in your rain barrel you can buy a couple of feeder fish from your local pet store for less that a quarter. The fish will eat the mosquito larvae and their waste will provide fertilizer for your plants.
Feedback
Did you make your own rain barrel for your backyard garden or homestead? Let me know how it went in the comments below!
Pin It For Later


Making a DIY Rain Barrel
Build your own DIY rain barrel for an affordable option to collect rain water for your garden and homestead.
Materials
- Plastic Gutter Guard
- Screws
- Rain Barrel Spigot
- Cinder Blocks
Tools
- Oscillating Saw
- Drill
- Hole Saw Drill Bit
- Shovel
- Level
Instructions
- Use an oscillating saw to drill a rectangle in the lid of your rain barrel. This is where the barrel will collect water.
- Cut a piece of plastic gutter guard to fit over the rectangle hole in the lid. Secure the gutter guard to the lid with screws. The gutter guard will prevent debris from entering your rain barrel.
- Use a hole saw drill bit to drill a hole for the spigot on the front of your rain barrel. Make sure the hole saw drill bit that you buy is the correct size for the spigot kit you’ll be using.
- Attach the rain barrel spigot to your barrel.
- Use a shovel to level the area where you’ll be placing your rain barrel.
- Stack cinder blocks on your leveled dirt where you want your rain barrel to sit. You could stack the cinder blocks just high enough to fit your water can under the spigot. I plan on installing a DIY drip irrigation system in the future, so I went ahead and stacked my cinder blocks as high as possible. Cinder blocks are more stable if you stack them with the holes facing up. I turned them sideways for my last stack to give the rain barrel something level to sit on.

Leave a Reply